Slide Title 1

Aenean quis facilisis massa. Cras justo odio, scelerisque nec dignissim quis, cursus a odio. Duis ut dui vel purus aliquet tristique.

Slide Title 2

Morbi quis tellus eu turpis lacinia pharetra non eget lectus. Vestibulum ante ipsum primis in faucibus orci luctus et ultrices posuere cubilia Curae; Donec.

Slide Title 3

In ornare lacus sit amet est aliquet ac tincidunt tellus semper. Pellentesque habitant morbi tristique senectus et netus et malesuada fames ac turpis egestas.

Jan 14, 2011

garlic pull apart rolls

Garlic Pull-Apart Rolls Recipe - Step by Step

I had been eyeing this recipe of Suhaina's for a long time. When she brought them for our Singapore food bloggers' meet, I was totally sold. Finally managed to make them this weekend. I would highly recommend this to all those who are dying to bake but fear the yeast monster. Trust me when I say this is really fool-proof and you can feel so proud of yourself when done!

Eggless Garlic Rolls Recipe

I halved the recipe and got 8 mini rolls, enough to serve 2 very generously. We had one here and one there, through the weekend.

Garlic Pull-Apart Rolls
Recipe source: Suhaina
Makes 8 mini rolls

Ingredients:
Plain Flour - 1.5 cups
Warm Water- 1/2 cup + 1 tbsp
Yeast - 1/2 tbsp
Salt - 1tsp
Sugar - 1 tbsp
Olive Oil - 1 tbsp + 1 tsp

For Garlic Spread:
Salted butter, at room temperature - 6 tbsp
Minced garlic - 2 tbsp
Chopped coriander leaves - 2 tbsp

How I Made It:

1. Mix flour, yeast, warm water, salt and sugar together until you get a smooth, slightly stick dough.

Eggless Garlic Rolls Recipe

2. Add oil to your fingertips and knead until the dough springs back when you press with your fingers - about 4-5 mins.

Eggless Garlic Rolls Recipe

3. Wrap in cling film and allow to double by keeping in a warm place for about 45 mins. Meanwhile, make the garlic spread by simpy mixing all the ingredients.

Eggless Garlic Rolls Recipe

4. Grease a baking pan or loaf tin with olive oil. I used my Pyrex loaf pan which was the perfect size for 8 mini garlic rolls.

5. Knock down the air in the dough and divide the dough into two equal portions.

Eggless Garlic Rolls Recipe

6. Transfer one portion of the dough to a floured surface and roll gently into a rough rectangle of 1/2" thickness. Apply more flour sparingly if sticky.

7. Spread about 2 tbsp of garlic spread on one side.

Eggless Garlic Rolls Recipe

8. Roll from one end gently and firmly.

Eggless Garlic Rolls Recipe

9. Cut into half and then each half again into two halves to get 4 equal portions.

Eggless Garlic Rolls Recipe

10. Now place the rolls with the cut side up in the greased pan.
Repeat the same procedure for the remaining dough.

11. Spread a little milk on the rolls and add the remaining garlic spread on top. I am sure sesame seeds as Suhaina has added will make the flavour even better but I didn't have any.

Eggless Garlic Rolls Recipe

12. Allow to rise for another 20 minutes. In the mean time preheat the oven to 180C / 375F.

13. Bake for about 30 mins until the top is golden brown. My Pyrex glass pan usually takes longer to bake in, so mine took about 35 mins to bake just right.

Eggless Garlic Rolls Recipe

These are really really soft and have an amazing flavour. Serve fresh and hot!

Eggless Garlic Rolls Recipe

bread paneer rolls

Bread Paneer Rolls - Step by Step Recipe


The bunch of you who wrote to me asking 'post recipes that we can cook with kids' or kid-friendly recipes, etc etc, I am looking right at you. I don't have kids so I have never really tried this with them but I have a very good feeling about this, trust me you. 


Funky paneer recipes totally float my boat, especially if they are easy to prepare. I saw this recipe in a Nita Mehta book in the library. I didn't borrow the book and didn't have anything to quickly note down ingredients and details AND I made this a whole 2 months later. So this is pretty much my own recipe, coming to think of it. What that also means is, you can make it your own by simply adapting, adding, subtracting and testing out your own variations to the paneer mix used in this recipe. 

Bread Paneer Rolls Recipe
Adapted from some recipe of Nita Mehta's, I think. 
Makes 4 rolls

Ingredients:

1 cup crumbled paneer
1 small onion, chopped fine (I should have added this!)
1/2 tsp red chilli powder
1/4 tsp powdered cumin / jeera
1/2 tsp garam masala
1/2 tsp ginger garlic paste
A small bunch of coriander, chopped fine
1 tsp or a bit more tomato sauce / ketchup
4 slices of bread
Butter to toast
Salt to taste

How I Made It:

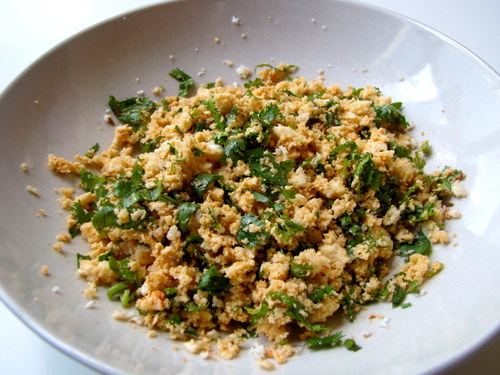
Place the crumbled panner in a nice bowl. Mine is from Ikea, thanks for asking.

Add the red chilli powder, garam masala, salt, chopped coriander, chopped onion, and jeera to this. 

Mix lightly with your finger tips. 

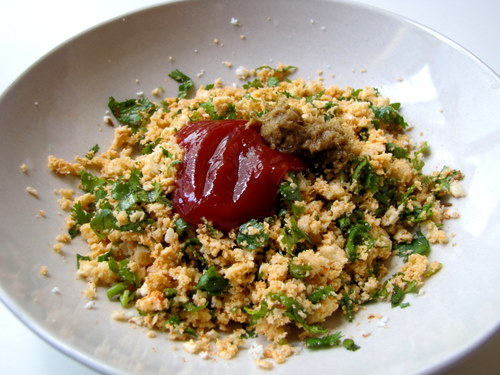
Then add the tomato sauce or ketchup and the ginger garlic paste. 

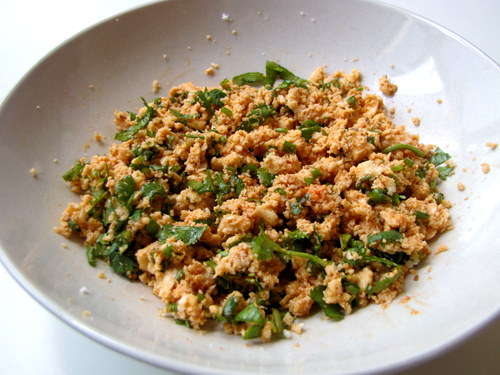
Blend again with finger tips. Set aside while you prep the bread.

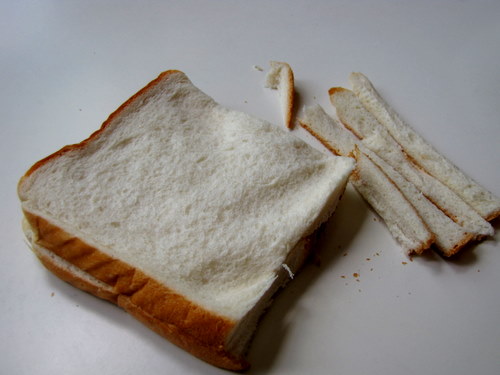
Remove the crusts from your bread. Use the regular white commercial variety. 

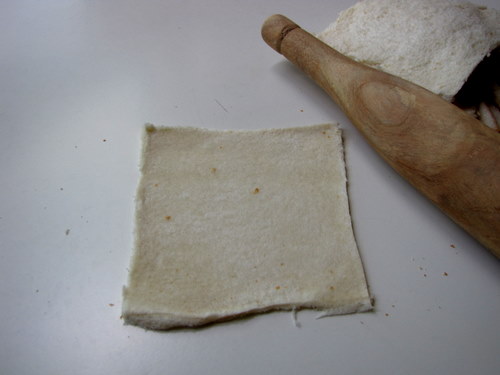
Roll out each slice as thin as you can. Commercial bread will have tons of leaveners in it so you get to do this quite easily. 

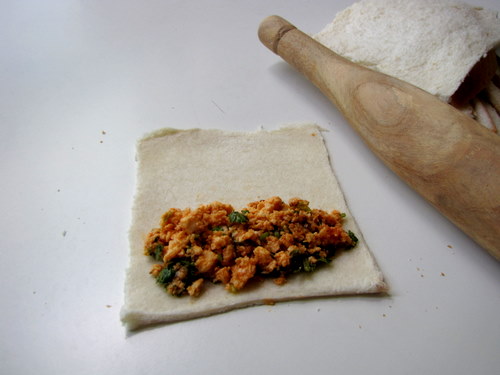
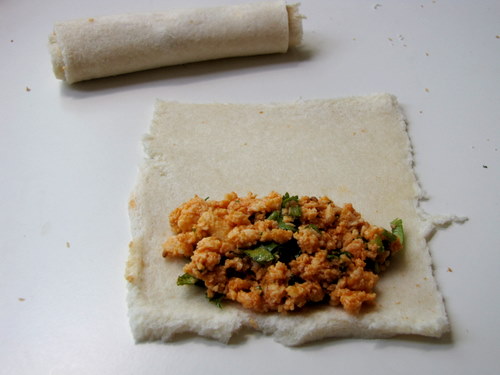
Place about 1 tsp or so of filling on one end of the rolled out bread slice. 

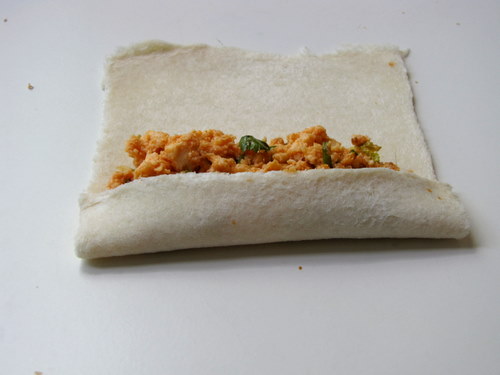
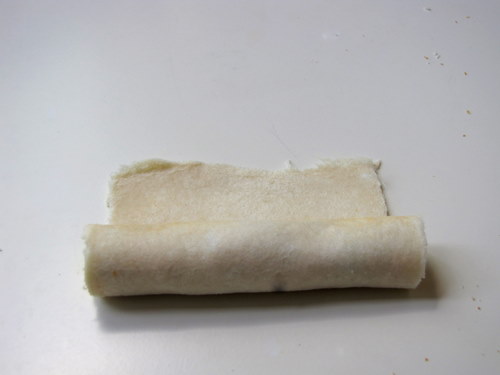
Gently roll in from one end, making sure that the filling stays well within the first turn of the roll. 

Go ahead and roll it all up. 

Repeat with the remaining bread slices. 

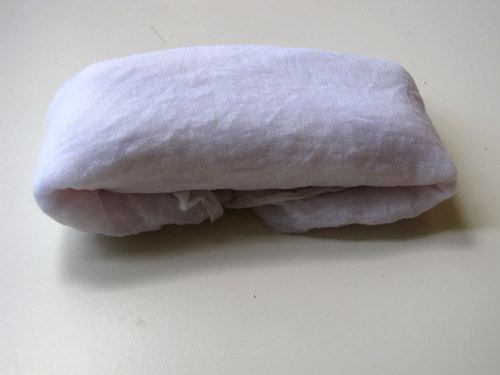
This step may be unnecessary but I remember the book mentioning it so I did it. Wrap up the tightly rolled bread slices with filling in a clean, damp kitchen towel. I used my cheese cloth, folded over twice for enough thickness. 

Set aside for about 15 mins. I think this makes the bread moist or something, no idea why we would do this otherwise. If you omit this step, let me know how that turns out, won't cha?

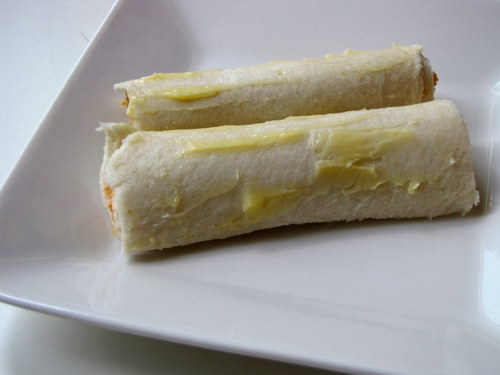
Now, butter up the rolls well on all sides. 

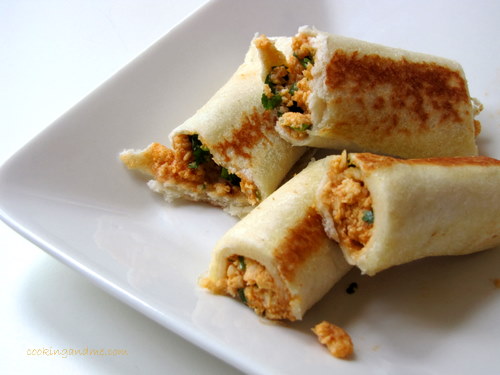
Lightly roast in a pan until all sides are browned. Cut up and serve with tomato sauce. Don't they look lovely? 

If you have store bought paneer in the fridge, then this can be put together in minutes. Imagine a fun evening cooking this with your kids or even better, wow-ing your guests with an appetizer that hardly took more than 30 mins to make. Its easy to do a bulk batch of this too. You can also cut up the rolls into smaller discs, stick a toothpick in, and serve it as a fancier appetizer. 

chena vanpayar

Chena Vanpayar Erissery Recipe

I have been baking a lot lately and realising how much I enjoy it. But that doesn't mean I should give up on my roots and stop making these amazing Kerala recipes. Nothing can transport me back home virtually like a good Kerala sadya.

erissery

The last time I posted Erissery, I got a few comments asking for chena vanpayar erissery. Clearly, pumpkin is not a very favourite vegetable to most. But vanpayar is not easily available here and I couldn't find it in Mustafa Stores which practically means its non existent in Singapore.

DSC_0120

So I did what any self-respecting food lover cum food blogger would do. I brought a bag back from my last trip to Kottayam. So today, I can share the authentic Erissery recipe with you. Howzaaat?

DSC_0132

I absolutely love chena / elephant yam btw. If you are in Singapore and didn't know this yet, Mustafa stocks frozen cubed elephant yam now. No more buying a huge yam and wasting majority of it or trying to rub oil on your itching palms after cutting up a yam. Hooray!
Authentic Chena Vanpayar Erissery Recipe

Ingredients:
3 cups cubed elephant yam / chena
1 cup cow peas / vanpayar
Salt to taste

Grate together:
1/2 cup grated coconut (frozen will work but not dessicated)
1 tsp minced fresh garlic
1/4 tsp pepper powder
A large pinch of turmeric powder
1/4 tsp chilli powder

For tempering:
1/2 tsp mustard seeds
2 dry red chillies, torn into small pieces
A few curry leaves
1 tbsp coconut oil (anything else would make it taste less authentic!)

How I Made It:

1. Wash the vanpayar and sift out any stones that may be there. I found two decent-sized ones in my 1 cup of vanpayar. Transfer to a pan with 3 cups water and cook on a low fire until semi-soft. This will take about 20 mins or so. Add the yam to the vanpayar and cook until both turn soft and almost mushy. (I took the easy route and dunked everything into a pressure cooker and cooked for 2 whistles. The vanpayar was done perfectly but the yam became too soft. You can do this if you don't mind the consistency of erissery seen in the pictures)

2. Once the vanpayar and yam are cooked, add the grated coconut mixture and mix well, cooking on low flame until well combined and the coconut loses its raw smell - about 3-4 mins. Add salt. Mix again. Remove from fire.

3. Heat oil for tempering and add all the ingredients mentioned in the list. When the mustard seeds pop and the red chillies glisten, remove from fire and dunk into the cooked mixture. Mix well and serve hot with rice and moru curry.
DSC_0160-1

I've also made a variation of this dish without the coconut - Yam and Black Eyed Peas Curry without Coconut

paneer butter masala restaurant style

Paneer Butter Masala: Restaurant-Style Recipe - Step by Step


Let's talk about Paneer Butter Masala today. Not just any kind, the kind that you get in Indian restaurants. Why? Well, I've already posted the Paneer Butter Masala Recipe I usually make, long back. Its also one of the most popular recipes on this site for two reasons:

- since its a popular Indian dish, a lot of people have tried it from my site and sent me feedback.
- this is the only recipe that has received as many good feedback as disappointing feedback.

Most people said this or a variation of this - "I tried your paneer butter masala recipe today. It came out nicely, I did everything you mentioned but it didn't come out like the one we had in that North Indian restaurant last weekend and my husband/wife/mom/dad/sibling loved! Help!"

I guess they found my Paneer Butter Masala Recipe too homely!

In most Indian restaurants, dishes are more creamy and have thicker gravy. The reason is very simple - they use cream. They use it as the base of every dish you order and it may make the dish arguably tastier. This is not hard to whip at home provided you have no qualms about adding that bit of cream and kicking up the amount of oil a notch.

So here it is, my second Paneer Butter Masala Recipe, like they serve in Indian restaurants!

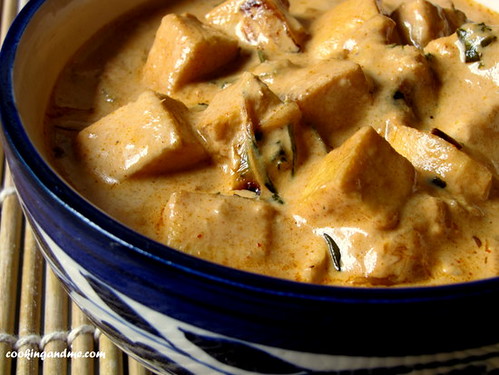
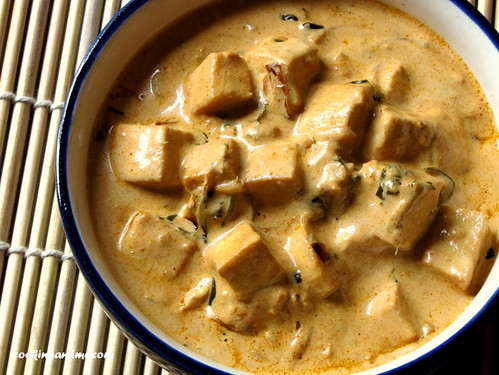
Oh did I mention its going to be step-by-step? Also, a huge thanks to my cousin Divya for giving me the basic recipe. Ok here goes, a picture of the final dish.

I'd say the only thing that's different from this dish and the one you get in Indian restaunts is the difference in the colour. That's because they add red food colour and I didn't.

Ok, let's get started.

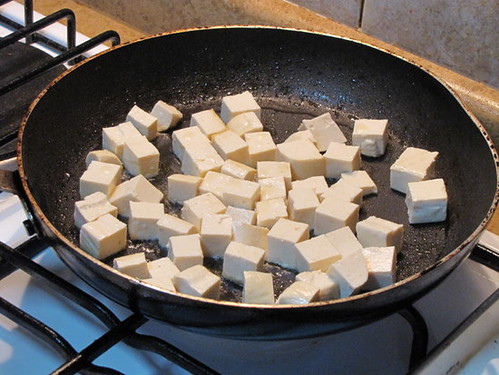
Add 2 tbsp oil to a hot pan and swirl around until the base of the pan is well coated.

Add in cubed paneer pieces.

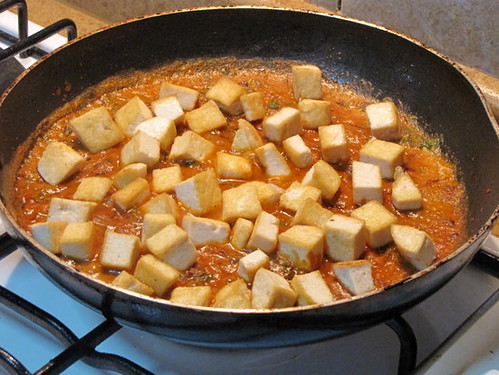
(Sidenote: Let's please pretend these are paneer pieces 'cuz its actually tofu. I was out of paneer and couldn't go all the way to get some. Also, it tastes as good with tofu, trust me!)

Lightly fry the paneer cubes until golden brown on all sides.

Drain and set aside on a plate lined with a paper napkin.

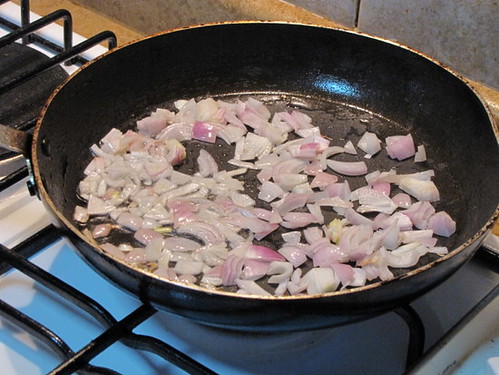
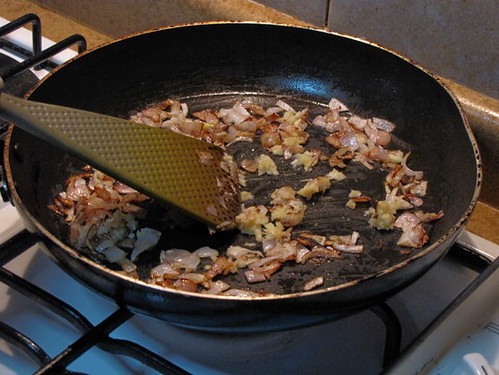
Add 1tbsp oil to the same pan and thrown 1 medium-sized chopped onion.

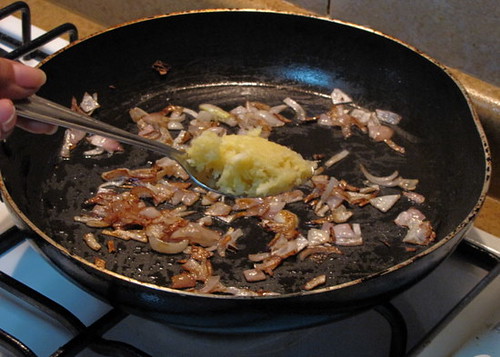
Fry until golden brown. To this, add 1 tbsp freshly minced ginger-garlic paste. (Ok fine, use your bottled paste, it just doesn't taste as good)

Fry for a minute.

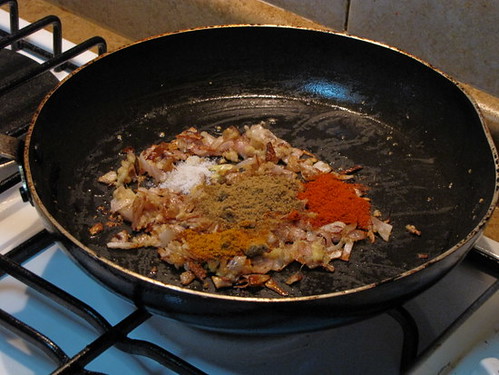
To this, add 1 tbsp dhania powder/malli podi, 1 tsp chilli powder, 1 tsp garam masala and 1/2 tsp salt. Fry for 30 seconds until the masalas are well combined.

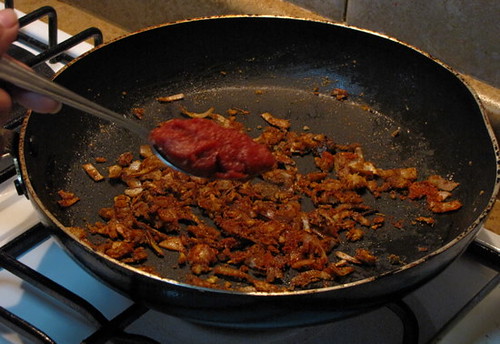
Next you need 1 tbsp tomato paste. I used the same kind I used for the Tomato Spinach Pulao. If you don't have tomato paste handy, just puree 1 medium-sized tomato and add it at this stage.
Next we need tomato ketchup or tomato sauce, the bottled Maggi/Heinz kind. Add in an almost-1tbsp of this.

Bring out your kasuri methi next. A generous pinch of this needs to go in.

(This picture makes my heart break, btw. The focus should've been on the kasuri methi but its actually on the blob of tomato sauce in the pan. Well, I took only one shot and my hands were smeared with oil and ketchup and I had to balance.. oh never mind!)

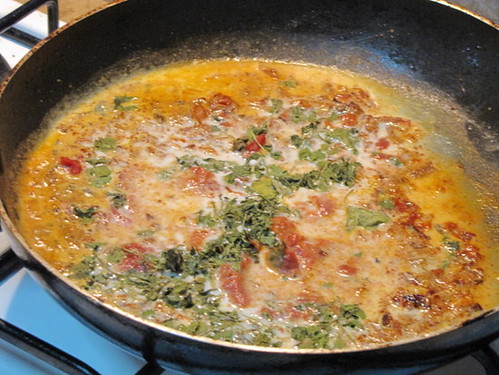
To this mixture, add 1/2 cup milk. Mix well and cook covered for about 5 minutes on low fire.

Meanwhile, bring out the secret ingredient for making restaurant-style paneer butter masala (or any Indian curry for that matter). CREAM!

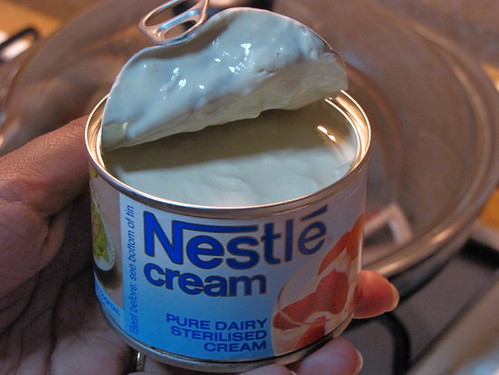
I used Nestle cream but if you have fresh cream, please oh please use that. Just open the can and set aside or get your fresh cream ready.

Once the tomato sauce mixture has cooked covered for 5 mins, open and add the fried paneer.

Top this off with 1 cup cream. Mix well and simmer on low fire for 3-4 mins. Adjust salt.

The recipe again, all in one place.
Paneer (or Tofu) Butter Masala: Restaurant Style Recipe

What I Used:

Paneer/tofu - 1 block, approx. 2 cups of cubes
Onion - 1 medium-sized one, chopped fine
Ginger-garlic paste - 1 tbsp
Dhania powder/malli podi/Coriander powder - 1 tbsp
Garam masala - 1 tsp
Red chilli powder - 1 tsp
Tomato paste- 1 tbsp (or 1 tomato, pureed)
Tomato sauce/ketchup - almost 1 tbsp
Kasuri methi/dried fenugreek leaves - 1 generous pinch
Milk - 1/2 cup
Cream - 1 cup
Oil - 3 tbsp
Salt - to taste

How I Made It:

1. Heat 2 tbsp oil in a pan and fry the paneer/tofu cubes until golden brown. Drain and set aside.
2. In the same pan, add 1 more tbsp oil and fry the onions until golden brown.
3. Add the ginger garlic paste and fry for a minute.
4. Next, add the dhania, garam masala, chilli powder and some salt. Fry for 30 seconds.
5. To this, add the tomato paste/puree, tomato sauce and kasuri methi. Mix well and add the milk.
6. Lower fire and cook covered for 5 mins.
7. Open lid, add the fried paneer/tofu and the cream. Mix well and simmer for 3-4 mins.
8. Garnish with fresh coriander leaves if you have any.

ariselu

Ariselu Recipe

Ingredients

  • 1 kg Rice
  • 3/4 kg Jaggery (grated)
  • 2 tsp of Sesame Seeds
  • Oil, to fry
Method
  • Wash rice thoroughly
  • Soak them overnight and remove water completely
  • Spread them on a cloth for a few minutes to make sure that the rice is dry
  • Make a fine powder of it in a blender
  • sieve if necessary and set aside
  • The flour should be slightly damp
  • Add one cup of water to the grated jaggery and heat it in a pan till it melts
  • Sieve to remove any unwanted stuff
  • Heat it on low flame till it becomes thick syrup
  • Add the rice flour to it slowly and stir well
  • Remove flame and make sure that no lumps are formed
  • When slightly cool make big lime size balls of it
  • Heat oil in a thick bottom pan
  • Pat each ball into a thin, round and flat disc on a banana leaf or a plastic sheet and dab it with a few sesame seeds.
  • Fry each one in oil on low flame till deep brown and remove
  • To remove the oil completely, place it between two flat ladles and press.
  • Repeat the procedure till the dough is over
  • When cool store them in a container
  • These Ariselu last for more than two weeks