Slide Title 1

Aenean quis facilisis massa. Cras justo odio, scelerisque nec dignissim quis, cursus a odio. Duis ut dui vel purus aliquet tristique.

Slide Title 2

Morbi quis tellus eu turpis lacinia pharetra non eget lectus. Vestibulum ante ipsum primis in faucibus orci luctus et ultrices posuere cubilia Curae; Donec.

Slide Title 3

In ornare lacus sit amet est aliquet ac tincidunt tellus semper. Pellentesque habitant morbi tristique senectus et netus et malesuada fames ac turpis egestas.

Jan 28, 2011

SUNNUNDALU

Minappa Sunnundalu (Urad Dal Laddo) is a traditional Andhra sweet dish that is simple to prepare. Can be stored in an air tight container for at least 2 weeks.
Ingredients:
1 cup black gram lentil (without husk)
1 tbsp raw rice
1 cup granulated sugar
1/2 cup ghee/clarified butter
Dry roast raw rice in a vessel till red on low to medium flame and remove. Now dry roast black gram on a low to medium flame till deep red and till you get a nice aroma, which could take at least 18-20 minutes. You should keep stirring the dal while dry roasting, lest it burns. Remove and allow it to cool. Blend both the raw rice and black gram to a fine powder. Keep aside.
Here’s a picture of the black gram dal both before and after dry roasting it.
Blend the sugar to a fine powder. Keep aside. Heat ghee till it melts. Do not over heat. Keep aside.
Now mix together black gram powder and powdered sugar in a wide plate. Slowly add hot ghee and keep mixing with hand, till the mix holds together.
Shape into round balls of the size of a big lime.The ghee should be just enough to hold the powders together and not drip while making balls.
Stored the sunnundalu in an air tight container. Stay fresh for at least 2 weeks.
Variations
A combination of jaggery and sugar can be used. Take 3/4 cup jaggery and 1/4 cup powdered sugar.
Tip
Mixture of black gram powder and sugar can be stored in an air tight container for 1-2 months. When ever required mix melted hot ghee and make balls.

Jan 25, 2011

Aratikaya Vepudu (Raw Banana/Plantain Fry)


Ingredients:

  • Raw banana (plantain) - 1
  • Turmeric powder - 1/4 tsp
  • Red chilli powder - 1/2 tsp
  • Salt to taste
  • Water for boiling
  • Dried red chillies - 3
  • Curry leaves - few
  • Split black gram - 2 tsps
  • Cumin - 1 tsp
  • Mustard seeds - 1 tsp
  • Tamarind paste - 1/2 tsp
  • Oil for frying


Preparation:

  • Cut raw banana into 4 pieces and boil in water for about 15 minutes.
  • Once boiled peel the skin and grate it as shown above. Optionally after boiling banana can be thoroughly mashed to prepare this dish.
  • Apply half teaspoon of tamarind paste thoroughly.
  • Now in a pan take 3 spoons oil and preheat it.
  • Add seasonings and wait for them to pop up. It will take only few seconds. Once these starts smelling good add turmeric powder.
  • Immedietely add the grated banana to it and mix it well.
  • Now add salt and red chilli powder as per taste and mix it well.
  • Switch off the stove and serve it hot with sambar or any dal dish which is great combo for this.
Now for the tip:Do not throw away the skin of the raw banana after boiling. This can be used to make chutney.. the recipe for this coming soon on the blog...till then happy cooking!!

Ragi (Finger millet) ladoos

Featuring today yet another delicious ragi dish - the ragi ladoos.

Finger millet (Eleusine coracana), also known as African millet or Ragi (Kannada: ರಾಗಿ), is an annual plant widely grown as a cereal in the arid areas of Africa and Asia. Finger millet is originally native in Africa and was introduced into India approximately 3000 years ago. It is very adaptable to higher elevations and is grown in the Himalaya up to 2300 metres altitude. More detailed information on ragi is here at wikipedia.

Bringing the ingredients together...


Ragi ladoos recipe
To make 10-12 ladoos; preparation time 40 minutes

Ingredients:Ragi flour – 1 cup
Ground nuts – 1 cup, roasted and pounded; or gingelly seeds – 1 cup, roasted and pounded
Jaggery – 1 cup, crushed to a fine powder
Salt – ¼ teaspoon

Method: Add the salt powder to the ragi flour. Pour sufficient boiling hot water into the flour to make it to a soft ball of dough. Divide it into 2 balls. Heat a frying pan till very hot over moderate heat. Brush lightly all over with some oil. With a wet hand, place one of the ragi dough balls at the center of the pan and pat gently with wet fingers to a thin round. Turn over on both sides alternatively to bake slowly and thoroughly for 5-6 minutes. If you prefer, pour a little ghee around the edges of the ragi roti while it bakes. Allow it to cool and tear the ragi roti into small bits.
Roast the ground nuts till they become crisp so that we can rub off the skins. Remove the skins and pound the ground nuts to a fine powder. Then add the cold ragi roti bits to it and pound both together till well blended into each other. Now add the crushed jaggery and pound all the three together till well mixed. Shape into lime-sized balls.
Although the color of these ragi ladoos may not look attractive to some, they are quite nutritious and tasty and flavorful. Enjoy!
:

Ragi Malt Recipe


Ingredients
1/2 cup dry fruits
1/2 cup milk
1 cup Ragi
pinch salt
as need 0 sugar or jaggari
3 cup water

Method:

Take a bowl mix ragi flour in some water to avoide lumps formation and keep it a side.

Take a pan add water get to boil then add the mixed ragi flour to it and keep mixing and cook for 5 -8 min.

once it done take a bowl add some butter milk or curd,salt and cooked ragi mixture mix well and serve.

another method take a bowl add some milk,dry fruits sugar or jaggari and ragi mixture mix well and serve.

RAGI SANKATI

Here is the recipe of ragi mudda or sankati the way we make in our home.
Ragi Flour, Rice and Salt - Ingredeints for Ragi Mudda
Recipe:
(for two people, for one serving)
1 cup of ragi flour
Fistful of rice
1/4 teaspoon of salt
4 cups of water
1 teaspoon of ghee
Preparation:
Take water and rice in a saucepan, add salt and bring to a boil. Cover and cook the rice until the grains are Ragi Mudda - In Final stages of preparationsoft. When the rice is soft, add - just pour or dump ragi flour into the pot. Donot stir now, this is the way folks back at home cook. Cover and put this mixture on medium heat for few minutes until the steam lifts the plate covering the pan. Remove the cover. Using a wooden masher or whisk, stir the ragi-rice mixure vigorously and thoroughly until you see no lumps.
Reduce the heat to low, cover and let it steam cook for about 15 minutes. Switch off the heat. Let it cool down a little bit and make mudda or balls with it. Back home, they dip their hands in cool water first and then immediately take a portion of ragi and shape them into a ball, all done very fast. Here, I use an ice cream scooper to make round balls.
How it is served: Place the ragi mudda in a bowl and pour the sambhar over it. Not too cold and not too hot, just warm is perfect for the palate. Drizzle ghee over it. Today I made carrot sambhar for ragi mudda. It tastes quite good not only with sambhar and but also with peanut chutney, potato kurma or any other vegetable gravy curry. People in Telangana region of Andhra, are particularly fond of ragi mudda/sankati-chicken kurma combination.
How it is eaten: Using your hand or with a spoon, take small portions from the big ragi mudda, dip them into sambhar and swallow. Don’t use teeth; let the tongue do the work. Ragi can be incredibly gummy so traditionally the small balls are never bitten, they are just swallowed. Warm ragi mudda coated all around with sambhar… gives an incredible satisfaction. Children love this kind of food.
Variations: As I mentioned above, you can change the recipe to suit your taste just by changing or adding ingredients. Basic method of preparation is the same, but you can make it mildly sweet by adding jaggery or sugar. Or more rich by substituting the water with milk. You can also add one tablespoon of ghee while still cooking. Also add toasted and finely powdered cashews or peanuts to make it even richer.
Ragi Mudda (Ragi Porridge / Ragi Sankati) in Carrot Sambhar
Ragi mudda or santaki in Carrot sambhar with ghee ~ Our meal today.

BAJJI MERAPAKAYA

Ingredients:
• 10 Green chillies, preferably big ones
• 100 gms Chickpea flour
• 1 tbsp Rice flour
• 1 Large potato, cooked and mashed
• 1/2 tbsp Tamarind paste
• 1 tsp Cumin powder
• 1 tsp Red chilli powder
• 1 tsp Ginger paste
• 1/4 tsp Turmeric powder
• 1 Pinch asafoetida powder
• Salt as per taste
• Oil for deep frying


How to make Chilli Bajji:
• Combine together the rice flour, chickpea flour, cumin powder, asafoetida powder, red chilli powder, turmeric powder and salt.
• Prepare thick batter using water.
• Slit the chillies keeping its tail-end intact.
• Remove the seeds.
• For preparing stuffed chilli bajjis, mix tamarind paste and mashed potato with a little salt.
• Fill the mixture inside each Chilli and close them well.
• Dip the chillis in the batter and deep-fry in the oil.
• Serve Chilli Bajji with sauce.

ALOO PANEER KORMA

Aloo Paneer Korma

Ingredients:
3/4 chopped onions
2 green cardamoms
2 cloves
1 inch stick cinnamon
4 potatoes, diced
1/3 cup grated fresh coconut
1 tbsp + 4 tbsp oil
3/4 cup diced paneer
1 tsp salt
juice of 1/2 lime

Spice paste:
1 tsp chopped ginger
2 green chillies
2 cups chopped coriander leaves
1 tsp fennel seeds (saunf)

Method:
1. Grind fine all the ingredients for the spice paste with half the onions.
2. Roast the cardamom, cloves and cinnamon and grind to a fine powder.
3. Boil the potatoes until just done.
4. Extract the coconut milk by adding 1/3 cup warm water, grinding it in a mixer and passing it through a strainer.
5. Heat 1 tbsp oil in a pan and fry the remaining onions until golden brown.
6. Mix in the powdered spices and the spice paste.
7. Add potatoes and fry well
8. Heat 4 tbsp oil in a frying pan and fry paneer cubes until light brown.
9. Add the fried paneer to the potatoes
10. Stir in coconut milk and bring to boil.
11. Sprinkle in salt and lime juice and remove from heat.
12. Serve hot.

CHATPAT PANEER

Servings: for four persons.
Preparation time: 30 minutes

The ingredients that you need for chatpata paneer recipe

250 gm of paneer.
Three to four tea spoon of chopped garlic or one tea spoon of garlic paste (either finely chopped or in the form of paste)
One to two onions of medium size or five table spoons of onion paste (either finely chopped or in the form of paste).
Five table spoon of vegetable oil or ghee.
Half cup or about 100-150 ml of curd( beaten to a fine paste so that there are no lumps and it appears smooth)
Three tea spoon of kaju paste.
Two tea spoon of badam paste.
Four table spoons of cream( whipped)
Spices:

Three tea spoons of coriander powder.
One tea spoon of kasuri methi.
One tea spoon of jeera.
Half tea spoon of red chilly powder.
Half tea spoon of kalimirch powder.
One table spoon of lemon juice.
One tea spoon of garam masala.
Salt to taste.
For garnish:
One table spoon of finely chopped coriander leaves.

Method

Heat the oil or ghee in the pan.
Add jeera and finally chopped garlic and sauté till they are golden brown in color.
Add onion paste to the pan and sauté again till it is light brown in color.
To this onion paste now add coriander powder, red chilly powder, salt, garam masala, kalimirch powder, kaju paste, badam paste, kasoori methi and sauté well for five minutes.
Once the paste is done and the spices begin to emit the aroma, add to the paste paneer cubes and whipped curd. Simmer the flame and stir for five minutes. Add lemon juice and stir again.
Finally add whipped cream. Stir for one minute and turn off the flame.
Pour the preparation in a serving dish. Garnish with chopped coriander leaves. The dish is ready to be served with bread, chapattis, butter Nan or missy roti.

Jan 24, 2011

HOW TO PREPARE HOME MADE WAX

How to prepare Home made wax? sugaring
Ingrédients:

4 cups of sugar
½ cup of Lemon juice
½ cup of water

Preparation:

1. Mix the sugar, water and lemon juice in a skillet or a sauce pan (From my experience it is always good to mix the ingredients before keeping it on flame)
2. Keep the container on a low flame after mixing.
3. Keep stirring the mixture until the sugar solution melts and you have a thick brown liquid. Normally it takes 10 to 15 minutes on low flame.
4. If you have a candy thermometer, The temperature we need to stop cooking the sugar solution is 235-245* F, They call this Soft ball consistency. If you drop a small amount of syrup into chilled water, It forms a soft, flexible ball, but flattens like a pancake after a few moments in your hand.
5. Let it cool . Hot sugar wax can burn your skin so don't rush to use it after it is prepared and it is still hot.

See next module for how to remove hair with wax..How to remove unwanted hair with wax? Waxing Technique
1. For the first time let the wax cool by it self to room temperature, If it cools below the required consistency, you can warm it by keeping the vessel in hot water or using Wax warmers.You can also warm it in microwave using a microwave safe vessel. Always check the heat before you use it.
2. Test the temperature before applying the wax to your skin. It should be warm, but not scalding, or you can burn yourself.
3. Clean the area where you want to wax. Pat it dry and apply loose powder with a powder puff or sponge to keep it oil free.
4.Once the wax cools slightly, test it on your finger. Blow on it, to cool it with your breath and apply it to your skin with a butter knife or waxing knife, in the direction of hair growth.
4. Place a clean cotton cloth strip on the wax and yank it against the direction of hair growth.
5. Wipe the area clean with a cold cloth or a clean sponge after you've finished waxing.
6. Apply ice to the waxed area or clean the area with cold water, to close and tighten pores.
7. You may notice that your skin has turned red, or that you have tiny bumps on the skin immediately after waxing. This is a normal reaction, and the redness and bumps should disappear within an hour.
8. Apply moisturizer or soothing lotion after cleaning the skin.
9. Gently massage the area with moisturizer so that moisturizer sinks into the skin and soothes it.
10. If you see any single hairs that are didn't come out , remove them with threading or plucking.

Note : Using disposable waxing strips is hygienic and keep us away from infections and allergies.. So I advice you to use disposable waxing strips.

Jan 17, 2011

HYDERABADI CHICKEN DUM


Biryani! Doesn’t that word conjure feelings of joy and comfort? Who doesn’t love this pampered, fragrant, rice delicacy that reigns supreme as the world best one pot meal?
hyderabadi-chicken-dum-biryaniHyderabadi Chicken Dum Biryani
For many of my dear readers, today’s post is a long awaited one. At last I got to blog the recipe of the quintessential ‘home style’ Chicken Dum Biryani from the royal kitchen of the Nizams. A dish that calls for an elaborate process and requires lots of TLC aka ‘tender loving care’ while preparing unlike the quick pressure cooker biryani. There are two versions, Kachha (raw) and Pakki (cooked) Biryani. Today’s recipe is basically a Hyderabadi kachha style of biryani where marinated raw chicken and partially cooked basmati rice are layered and cooked on dum, over low heat. I prepared this biryani a couple of times, the recipe is perfect and has never failed me. Once the biryani is cooked on dum, as you open the lid, the kitchen smells fragrant, rich with the reassuring aroma of pure ghee and saffron and the chicken cooked to melt in the mouth tenderness.
chicken-dum-biryani
Chicken Dum Biryani
A few things to keep in mind while preparing biryani. Use best quality aged Basmati rice, good quality chicken and the best saffron available. Marinate chicken for at least 4-6 hrs and if running out of time then two hours will do. No short cut methods and all the ingredients listed below are a MUST, in other words, there are no substitutes for the mentioned ingredients.
marinated-chickencooked-rice
Marinated Chicken ~ Partially cooked basmati rice
caramalized-onionssaffron-milk
Caramelized Onions ~ Saffron Milk
Hyderabadi Chicken Dum Biryani Recipe
Marination: 4 hrs Prep & Cooking: 1 hr
Serves 6-7 persons
.
Ingredients:
1 kg chicken, washed and drained completely
2 large onions, finely sliced
2 tbsps chopped coriander leaves
1 tsp saffron
1/2 cup luke warm milk
salt to taste
2 tbsps ghee + 5 tbsps oil
For marination:
3/4 cup thick curd/yogurt
8-10 green chillis, make a small slit in them
1 1/2 tbsps ginger garlic paste
1 tbsp red chilli pwd (adjust)
1/4 tsp turmeric pwd
3/4 tbsp coriander pwd
1/2 cup chopped coriander leaves
3/4 cup pudina leaves
juice of 1 lemon
1 3/4 tsps salt
Biryani masala, make pwd:
8 cloves
1″ cinnamon stick
4 elaichi/cardamom
3/4 tsp shah jeera
12 pepper corns
Ingredients to cook rice:
4 cups Basmati rice
6 cloves
3 cardamoms
1″ cinnamon stick
3 bay leaves
1 marathi mogga
1 star anise
10 mint leaves
1 tbsp oil
1 1/2 tbsps salt
water as required
1 Marinate chicken with the ingredients called for ‘marination’ along with biryani masala pwd. Keep aside for 4 hrs or a min of 1 1/2 hrs. While the chicken is marinating, work on the rest of the preparation.
2 Cook basmati rice in lots of water along with bay leaves, cloves, cinnamon, cardamom, marathi mogga, elaichi, oil, salt till its half cooked. Strain the water and spread the rice on a large wide plate. Allow to cool.
3 Heat 1 tbsp oil + 1 tbsp ghee in a vessel, add sliced onions, saute for 8-10 mts till caramelized. Remove and keep aside.
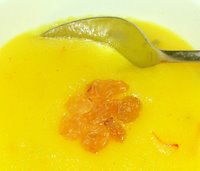
4 Add the saffron to the luke warm milk and combine well. Keep aside.
5 Take a wide deep vessel to prepare the biryani. Add 3 tbsps oil, add the marinated chicken and spread out over the vessel. Cook on high for 2 mts. Add a tbsp of oil over the chicken pieces. Reduce flame.
6 Spread half of the rice over the chicken layer, pour half a tbsp of ghee all over the rice, add half of the caramalized onions and spread over the rice. Next sprinkle a tbsp of coriander leaves and pour about one fourth cup of saffron milk over the rice. Over this layer, spread the remaining rice. Again pour half a tbsp of ghee all over, add remaining caramelized onions and spread over the rice. Finally sprinkle a tbsp of coriander leaves and pour remaining saffron milk over the rice.
7 Place lid and over the lid place a heavy weight and seal the edges with wheat dough. Cook on high flame for 2 mts. Remove the vessel from the stove and place a iron tawa. Allow to heat. Reduce to low flame and place back the biryani vessel on the iron tawa and cook biryani for 20-25 mts. Turn off heat and do not remove lid for 10 mts.
8 After 10 mts, remove lid, combine gently and serve hot with raita and curry of your choice
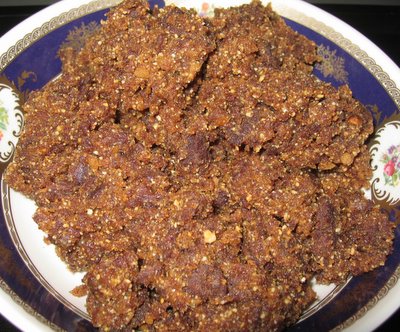
Hyderabadi Chicken Dum Biryani


Rava Kesari (fine rava)
Kesari is an easy and very delicious sweet, a dessert from South India. Here is the recipe for plain Rava Kesari. ( click here for Kesari recipe using Regular Rava)
Ingredients:
Fine Rava – 1 cup
Sugar – 1-½ cups
Water – 2 cups
Saffron – ½ teaspoon
Ghee – 3 tablespoons
Cardamom – 5 pods crushed
Raisins for Garnishing
Ghee fried cashews can be added to the sweet.

Method:

Ghee roast the Rava and keep it aside. Heat water in a heavy kadai. When it starts to boil, add the saffron. You will notice the water turning to yellow color.

Reduce the heat and add the Rava slowly (keep stirring while adding to avoid lumps). Keep stirring till Rava is fully cooked (At this time the consistency will not be too loose).

Now add the sugar slowly, while stirring it at the same time. You will notice the consistency loosening. Add the cardamom.

Keep stirring until the kesari thickens. It will start sticking to the bottom. Now, add the Ghee and stir well. A lot of stirring, but worth the effort. Garnish with raisins/cashews. Serve hot or at room temperature.

stuffed bread pakoda

    Ingredients (Makes approx 8 pakodas)
    For the stuffing
  • 2 potatoes (to make abt 2 cups mashed)
  • 1 onion, chopped finely
  • 1 inch ginger, peeled and grated
  • 1-2 green chillies, thinly sliced (or as per taste)
  • 1/4 cup frozen peas (boiled if using fresh)
  • 1/2 tsp mustard seeds
  • 1 tsp cumin seeds
  • 1 tsp urad dal (split black gram)
  • 1 tsp cumin-coriander powder(optional)
  • 1/2 tsp garam masala (or use chaat/pav bhaji masala)
  • salt to taste
  • few curry leaves and cilantro to garnish
    For the Covering
  • Around 8 slices of wholegrain bread
  • 1 cup besan (chickpea flour)
  • 1/2 cup rice flour
  • 1/4 tsp turmeric
  • 1/2-1 tsp chilli powder (or as per taste)
  • pinch of asafoetida
  • little salt (since the stuffing has salt too)
Note: These measurements are approximate. You can adjust the ingredients as per your taste

Method
Slice the crusts off the bread. Its optional. Many a time, I just let them be. If slicing, you can use the crusts to make bread crumbs.
Indian Stuffed Bread Pakoda/Pakora recipe
Meanwhile steam the potatoes. Alternatively you can boil them too.
Indian Stuffed Bread Pakoda/Pakora recipe
Mash them well. I retain the skins for nutrition. You can peel them if you wish to.
Indian Stuffed Bread Pakoda/Pakora recipe
In a skillet, heat 1 tsp of oil. Temper the mustard seeds and when they start popping add urad dal, cumin seeds, ginger, chillies along with onions. Add the spices and salt and when aromatic add the mashed potatoes along with peas. Mix in the herbs. Taste and test for seasoning. Adjust accordingly.
Indian Stuffed Bread Pakoda/Pakora recipe
Take one slice of the bread. Spread this potato mixture on one side of the bread. You can use more for a thick stuffed bread or a little – your choice.
Indian Stuffed Bread Pakoda/Pakora recipe
Place another slice on top.
Indian Stuffed Bread Pakoda/Pakora recipe
Press it tightly so that it holds together. The mashed potato will hold the bread in place.  Cut this diagonally to make two slices.
Indian Stuffed Bread Pakoda/Pakora recipe
See that yummy stuffing in the middle?
Indian Stuffed Bread Pakoda/Pakora recipe
Mix together all the ingredients for the batter/coating in a bowl. add enough water to make a thick batter – which will help to coat the bread slices. Add tablespoon by tablespoon of water to avoid thin batter. You need medium consistency. Dip one stuffed slice in the batter and coat both the sides.
Indian Stuffed Bread Pakoda/Pakora recipe
Drop this to med-high hot oil.
Indian Stuffed Bread Pakoda/Pakora recipe
When you find the bottom turning red/brown,
Indian Stuffed Bread Pakoda/Pakora recipe
turn the other side
Indian Stuffed Bread Pakoda/Pakora recipe
once done, drop it on paper towel to drain excess oil.
Indian Stuffed Bread Pakoda/Pakora recipe
See the crunchy covering and the yummy filling inside?
Indian Stuffed Bread Pakoda/Pakora recipe
Serve with any condiment of your choice – chutney, ketchup or chilli sauce. Whatever you have on hand. These are great on their own too

vankaya pachi pulysu


Ingredients 
  1. Bhaigan (vankaya) - 1 lb (about 6 to 7)
  2. Green chillies - about 8 (decrease or increase according to taste)
  3. Salt - as required
  4. Tamarind - medium lemon sized ball
  5. Coriander leaves - few
  6. Oil - 2 tbsp
  7. Seasoning - 1 tsp mustard seeds, 1/2 tsp of jeera, pinch of hing, few curry leaves and red chilli pieces

Method: 
  1. Soak tamarind in water for some time and extract juice (pulusu) from it and keep it aside.
  2. Wash and cut the bhaigan into pieces. Also slit the green chillies.
  3. Heat 1 1/2 tbsp of oil in a pan, add bhaigan, green chillies and cook covered until soft.
  4. When cool, grind to a paste.
  5. Chop onions into small pieces.
  6. Add tamarind extract to the grounded bhaigan. Add chopped onions, salt and mix well.
  7. Heat remaining oil in a pan and add the seasoning, when mustard starts to splutter add to the above pulusu.

home made khova

Get the milk boiling, ensure you keep an eye on the milk not spilling over!

Keep stirring.....

After about 45 mins or so, you better simmer the gas to low, but continue to stir. If you have somebody to take in your place, it is good if they can continue to stir! (I know it is hard not to miss the fun at FB, Twitter both of which has that irresistible question .Whats on your mind!or What are you doing? I typed eagerly "Stirring pot of milk!)


Finally the result of hard work or rather sweat, the milk is reduced to khova.

Of course, when I did Palkova in Microwave, it was much simpler as I added the sugar and ghee and stirred constantly. Whereas here it is just milk. And getting the right consistency is more important here as your end result depends on the making of Khova.

Since the secret is out of the bag, I might as well confess that I was embarking on the mission of making Gulab Jamun at home. So water content or the softness of the khova is very important. Do not over cook it after it got reduced.

Remove once you see the milk solids become dense. The khova should be soft and not very hard or crumbly


Homemade Khova or Mava (Unsweetened Mawa)

You need:

Milk - 1 & 1/2 litres
Thick bottom kadai or non - stick pan

Yields - 1 & 1/2 cup or more of Khova


This can be used for Gulab Jamun, Palkova, Carrot Halwa and many more sweets.

basic

Garam Masala Powder

4-5 cinnamon sticks
1 tsp cumin seeds
1 tsp coriander seeds
7 peppercorns
1 bayleaf
4 cloves
Ghee

Roast each of the above till they turn aromatic.
Powder to a fine powder using a coffee grinder and use as required.
This will keep well for months in a airtight container.
You can make a larger quantity of this by using the above ingredients in the same ratio.
Chaat Masala Powder

4 tbsp coriander seeds
2 tbsp cumin seeds
1 tsp ajwain (thymol) seeds
2-3 whole dry red chillies
3 tbsp black salt crystals1/2 tsp citric acid
1 tbsp dry mango powder (amchoor)
1 tbsp salt
2 tsp garam masala
1 tsp white/black pepper (optional)

Roast the first 3 ingredients seperately and powder them with the chillies, black salt and citric acid.
Mix in the remaining ingredients.
Store in an airtight container.

poha konkani

What you need to have:

1. Thin Beaten rice – 1 and 1/2 cup
2. Fresh grated coconut – 1 cup
3. Green chillies – 2
4. Dhania-Jeera powder (fresh) – 2 Teaspoon
5. Lemon juice – 1 Teaspoon
6. Sugar – 1 Teaspoon
7. Salt – as per taste
Ingredients of Seasoning:
1. Mustard seeds – 1 Teaspoon
2. Turmeric powder – 1/2 Teaspoon
3. Curry leaves – 2-3 Strands

Ingredients of Konkani Poha

What you do with what you have:

1. Clean poha and keep it aside. Wash and chop green chillies fine and grate coconut as well and keep aside as shown in image 1.
2. In a wide bowl crush well both the chopped green chillies and salt well and to it add grated coconut from step 1. Also add sugar and mix all the ingredients well with your hands so that it is mixed well the whole mixture turns damp.
3. Place a spatula with 2 teaspoons of cooking oil in it on medium flame. When heated add mustard seeds to it. Once it splutters add turmeric powder, curry leaves and turn off the flame.

Seasoning in progress
4. Pour this seasoning to the coconut mixture from step 3 to it and mix well with your hands so that it releases juice and a nice aroma of all ingredients.

Seasoning added to the coconut mix
5. Finally add required quantity of poha from step 1 to it. Mix well and is ready to serve.

Ready to serve Poha
6. Decorate it with chopped coriander leaves and chopped onions as well which is my all time favorite. One can even enjoy it with any mixture of your choice. Some people enjoy it with curds but without onions !

Ready to serve poha being garnished with onions & coriander leaves
How long it takes: 15 minutes
Number of servings: 2

Good to remember:

1. Please use quality coconut for this dish or else it becomes damp.
2. Please do not use water to make the coconut mix damp. Squeeze the mix well with your hands to mix poha in it.
3. On adding the seasoning to coconut mix one will be able to to squeeze it well since the oil content will help you to crush it well.
4. Adding sugar is a must since it will enhance the flavour of the dish.
5. One can even use tamarind pulp in place of lemon juice. Using tamarind will change the colour of the dish.